There’s so much that can be achieved from within your own home, but the ability to create your own microbrewery is a great achievement with real world benefits. Aside from drawing the envy of your neighbours – who will undoubtedly request samples – starting your own microbrewery could mean turning your hobby into a profitable business.
In this guide, we will help you to understand the basics of homebrewing as well as some of the complicated aspects of starting up your own microbrewery.
Ingredients
There are four key ingredients used to brew beer, but to effectively brew a great taste from home, it helps to understand how these ingredients affect the brewing process.
- Malts
Wine is made from grapes, cider from apples, and beer from malts. Malts are grains that have been germinated then dried to prevent further plant growth. The most common malted grain used in the production of beer is barley. To create interesting flavours and textures, it is common for brewers to add a small percentage made from a different grain, such as rye, oats or wheat.
A portion of the malts are also toasted to bring out the sugar and flavour. These malts are called the ‘specialty malts’, and will affect the beer’s colour as well as the flavour. Lightly toasted malts produce pale beers, for example.
- Water
Beginners can use any drinking water without worry, but more advanced brewers will consider the effects of mineral, hard and soft water, too.
- Hops
Hops are a flower used in beer making to counterbalance the sweet, sugary malts. Hops have a fairly bitter taste, meaning that it is important for beginners to carefully weigh their ingredients or risk making their brew inedible!
Hops add more than just flavour; they’re an important preservative and endow beer with that characteristic aroma. More advanced brewers might exchange or combine their hops with a variety of spices and herbs.
What Type of Hop?
For the entry-level brewer, there are two types of hop to be aware of: the pellet hop, and the full hop. A full hop, or whole leaf hop, is a freshly picked hop and which is used by experienced and dedicated brewers. Whole leaf hops can be stored in a fridge, but they spoil quickly. Most beginners, therefore, will rely on pellet hops when they’re starting out. Pellet hops are dried and compressed hop flowers that last a lot longer and are typically more affordable.
Hop Resin or Hop Oils?
When crafting the perfect taste, you need to pay attention to the type of hops that you are using. Hop resin adjusts the bitterness of your brew, where hop oils affect general flavour and scent more. There are three main groups of hops that are self-explanatory: bittering hops, aroma hops, dual hops.
For example, a bittering hop will have a higher percentage of hop resin than an aroma hop.
- Yeast
Adding yeast will consume some of the sugar from your solution to produce carbon dioxide and alcohol – this is where your solution starts to become a real beer. There are two types of yeast and these are ale yeast and lager yeast.
Ale Yeast
Ale yeast works best between 65°F to 75°F which makes it a popular choice for beginner home brewers. This temperature range means that you don’t need to purchase additional temperature monitoring equipment than if you were to use lager yeast.
Ale yeast is perfect for those who like their beers to be full of flavour and aroma.
Lager Yeast
A larger yeast wants to be kept at around 50°F for the initial fermentation, but brought down to a lower temperature – around 40°F – for ‘the lagering period’. Lager’s are understood to be more difficult to brew than ales, but can be extremely rewarding with their crisp, clean taste when done right.
For beginners, we recommend concentrating on crafting the perfect ale before diving into lager recipes.
Tools
There are plenty of gadgets for the aspiring home brewer to collect. Here are the necessities:
- Malt Grinder
You’ll need to find someone to grind your malts or do it yourself.
- Safe Storage for Ingredients
If you’re not using all your malts quickly, you’ll need somewhere dry and cool to store them. The same goes for your hops.
- Sanitiser
The success of each brew you make will depend on how well you can keep your equipment clean. Don’t risk contaminating your next batch by neglecting to clean your tools!
- Brewing Kettle
You’ll need to brew your ingredients together.
- Hops Spider
When boiling your hops into your beer, sediment collects at the bottom of your boiling kettle. You don’t want that sediment to wind up in your final brew, so you should use a hops spider to collect it.
- Corny Kegs
These kegs are used to force carbonate your beer using beer gas. In the olden days, beer was left to carbonate slowly overtime in a sealed bottle, but here in the 21st century force carbonation is far easier and less dangerous. You can read more about why corny kegs are so fantastic on one of our earlier blogs: Tips and Tricks to Make Your Home Brewing a Great Success.
- Chilling Plate or Immersion Cooler
One of the easiest places to fail your home brew is by failing to chill it quickly enough after the boil. A chilling plate can help you to cool your brew in seconds, ensuring that you maintain the taste and flavour that you want. Chilling plates can be expensive, so you might want to consider alternatives such as immersion coolers.
Step-by-Step Guide
Now that you’ve collected everything you need, you can start putting it together to make your beer.
- Cleaning
You should always start by checking that your equipment is clean. A boiling kettle stained with the remnants of last year’s beer is not a good start for your new brew.
- Heat the Water
Get out your boiling kettle and heat your water.
- Steeping
Add your grains and steep them for twenty minutes in a grain bag. Remove the grains without squeezing the bag – doing so could add unwanted tannins.
- Boiling, Malt Extracts, and Hops
Bring your solution to a rolling boil and, if your recipe requires you to, add your malt extracts and wait for them to dissolve. Your recipe will tell you when you should be adding your hops to the mix, but remember to avoid letting your solution boil over.
Congratulations! What you have now is called ‘wort’.
- Chilling
Failing to chill your wort quickly enough will create a hazy-looking beer, which no-one wants. We recommend using a chilling plate if you can afford to, but other home brewers use ice baths or ‘wort chillers’ which run cold water through your wort in pipes.
- Ready the Fermentation
Now that your wort is chilled, you need to ferment it. Do this by putting it into your corny keg and adding water as recommended by your recipe. Shake your keg a little before adding the yeast because yeast needs oxygen to work properly.
- Fermentation and Adding Yeast
Add the yeast and follow instructions for force carbonating your brew.
- Transfer Your Beer
You might need to use a siphon to get the beer out of your keg. One thing to bear in mind when transferring your beer into a bottling bucket is that you’ll be trying to avoid picking up any sediment from the bottom of the keg. A hops spider will have prevented the worst of it, but the solution at the bottom will likely still have some and it is very bitter to taste.
- Fill Your Bottles
Lastly, you need to bottle your beer. Now you have a finished product to share and sell.
What Is a Microbrewery?
If you think that you’ve got what it takes to compete in the brewing industry at a local or national scale, then you might consider turning your hobby into a business.
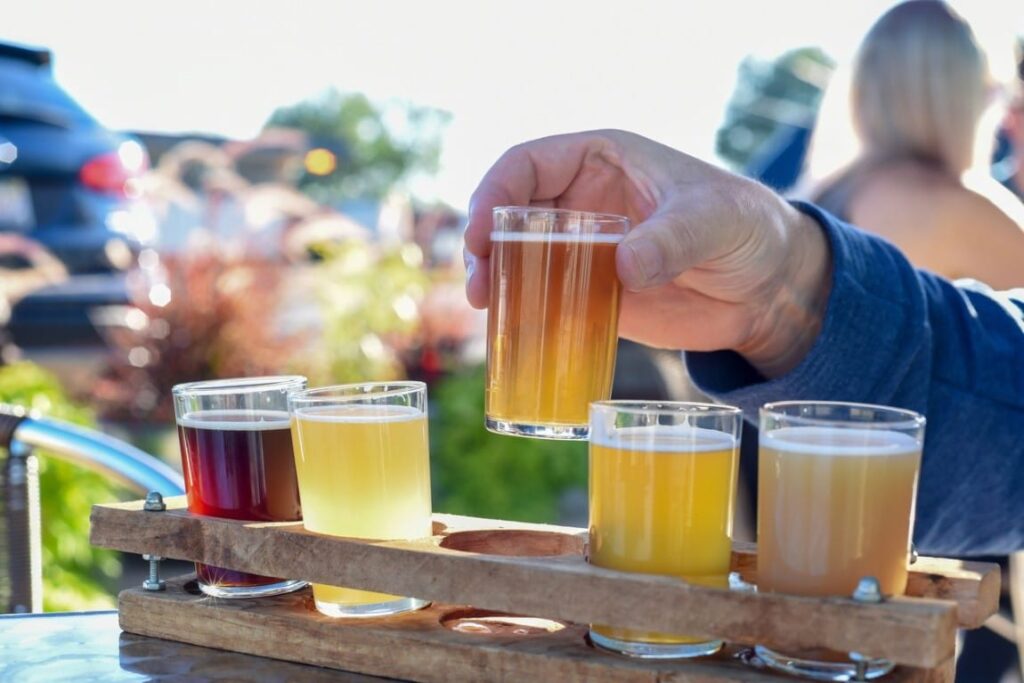
Microbreweries are famous for producing very small batches of beer that concentrate on flavour and quality. A craft beer, for example, refers to a beer produced in small batches with exceptional quality. Microbreweries concentrate on producing these kinds of high-class beers all the time.
With enough success, it’s possible to elevate a microbrewery into a brewpub. A brewpub is a highly unique enterprise that concentrates on selling the beers made by it’s founding microbrewery. In this manner, brewpubs can become important venues for local society.
It’s important to note that a microbrewery has more than one employee in the business. If you’re considering trying to turn your hobby into profit completely on your own, you would technically be classified as a nanobrewery.
Supporting You in Your Hobbies and Work
At Adams Gas, we love to see how our customers use our gas to further their passions. Whether you’re making beer as a hobby or for work, we’re more than happy to you our advice on our beer gas. We also support F1 enthusiasts with our nitrogen gas, and welders with MIG welding gas and TIG welding gas.
If you’re a hobbyist, get in touch and we’ll support you.